

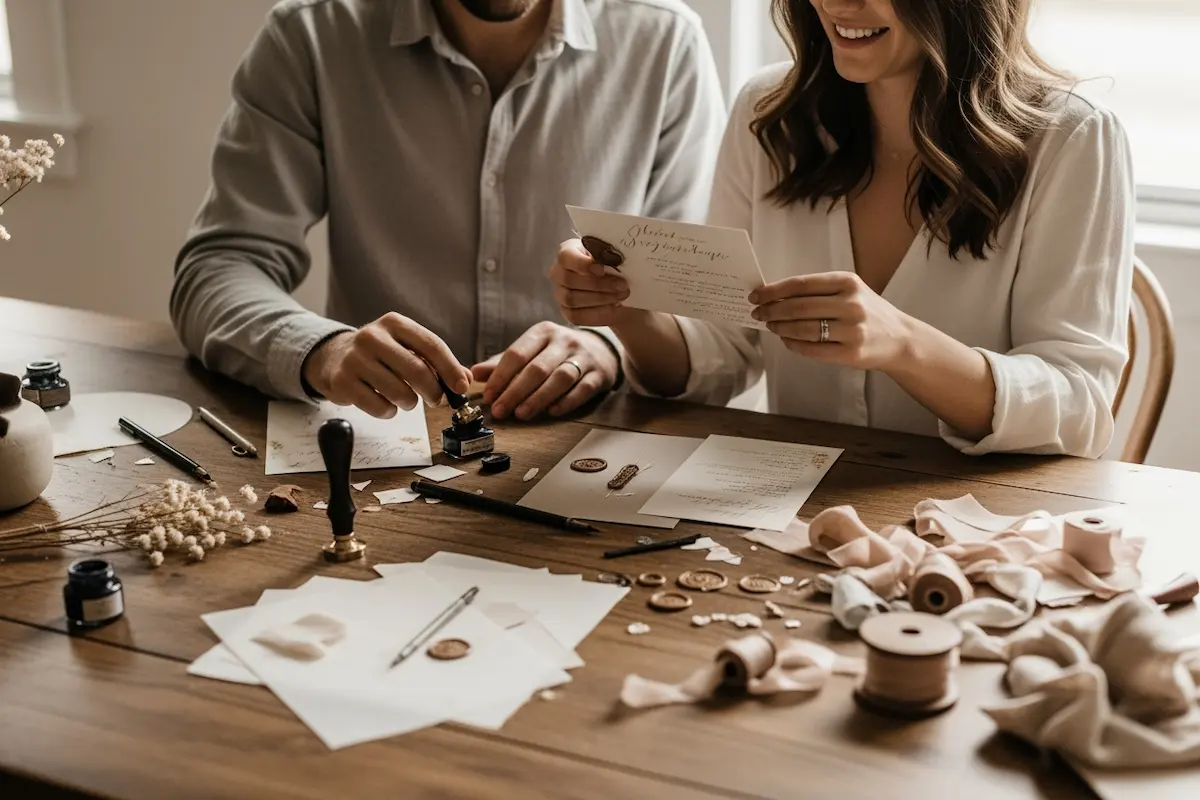
Nothing says “uniquely yours” quite like a wedding invitation you made together. Yet, many couples shy away from DIY wedding invitations, fearing the end result will scream “homemade” rather than “handcrafted elegance.” The truth? With the right approach and a few insider techniques, your wedding invitation DIY can rival even boutique stationers—no graphic design degree required. Here’s your blueprint for show-stopping, professionally finished DIY wedding stationery that fits into even the busiest wedding planning calendar.
The Professional Touch: Why Your DIY Wedding Invitations Matter
Your invitation is the first glimpse guests get of your day—its style, mood, and personality. Well-crafted homemade wedding invites deliver a personal welcome and set expectations, all while saving you money and injecting authenticity into your celebration. The trick? Focusing on details that elevate a DIY project into something unforgettable.

10 Techniques to Elevate DIY Wedding Invitations
Let’s walk through ten essential methods—covering everything from design principles and paper selection to finishing flourishes. Apply even a few of these, and your guests will be asking, “Who did your invitations?”
1. Start With a Clear Vision and Cohesive Theme
Before you touch paper or fonts, define your invitation’s look and feel. Gather inspiration from moodboards, Pinterest, or wedding blogs. Whether you’re dreaming of modern minimalism or classic romance, consistency is key. Your theme—colors, motifs, and vibe—should flow across every element.
2. Invest in Quality Paper and Envelopes
Nothing transforms wedding invitation DIY quite like premium materials. Seek out papers with a weight of at least 250 gsm (grams per square meter) for a substantial, luxe feel. Textured or cotton-based stocks add tactile, sophisticated interest. Coordinating envelopes, especially with a colored liner, make the presentation feel intentional right out of the mailbox.
3. Design With Simplicity and Space
Professional stationers know: Less is often more. Allow for generous margins and whitespace in your layout. Avoid overloading with fonts, colors, or imagery. Clean, classic design highlights the details—your names, date, and venue—while letting your personality shine through subtle touches.

4. Choose Timeless Fonts and Pair Thoughtfully
Typography says everything. Select no more than two typefaces—perhaps a flowing script for your names and a crisp serif for details. Choose easy-to-read, high-resolution fonts; avoid anything that feels too “clip art.” Balanced pairing instantly elevates the finished look.
5. Print Like a Pro: Digital, Laser, or At-Home?
For short guest lists, high-quality home printers (inkjet or laser) can work, especially if your design is mostly text. Choose “best” or photo mode in your settings, use branded inks, and practice on plain paper first. For more complex designs (like watercolors or gold foiling), local printers or small online shops can add the finesse you need—often for less than you’d think.
6. Consider Print Finishes (Even If DIYing)
Even without commercial equipment, you can get creative:
- Embossing or Debossing: Use a heat embosser or embossing folders for raised or pressed designs.
- Hand-Painted Details: Light watercolor washes or hand-torn edges are chic and cost-effective.
- Metallic Accents: Gilded edges or brush-painted gold add that modern luxury look.

7. Add Layers and Dimension
Stack your invite atop colored backing cardstock or vellum wraps. Belly bands (ribbons or paper strips) bundle together multiple pieces—invitation, RSVP, details card—helping your packet feel polished and organized.
8. Assemble With Care and Craftsmanship
Assembly is where many homemade wedding invites stumble—or soar. Take time to:
- Use a paper trimmer (not scissors) for clean edges.
- Align everything precisely; use a grid ruler or light table.
- Affix embellishments (like wax seals or twine) neatly and consistently.
- Double-check each suite before sealing up—nothing says “handmade” like a typo.
9. Budget and Time Management Strategies
DIY isn’t always cheaper—time and materials add up! Compare sample costs: A custom invitation suite might run $4–$10+ per set, while well-planned DIY can often be $1–$4 per set. Factor in tools (trimmer, ruler, adhesives) and backups for mistakes. Spread out your assembly over several nights and enlist your most meticulous friends for a little wedding craft party.
10. The Finishing Flourish: Envelope Addressing and Stamps
Hand-letter or print addresses using a clean, complementary font. Consider printed wraparound labels or subtly patterned address stickers. Choose stamps that fit your theme or use vintage postage for added charm. Small details at every stage help your invites feel complete and considered.

DIY vs. Professional Invitations: Which to Choose?
Here’s a quick comparison to help you weigh your options and maximize both style and sanity:
- Cost: DIY can save money, especially for small events or if you already have craft supplies.
- Time: Homemade wedding invites require planning, proofing, and careful assembly—block out extra weeks in your planning calendar.
- Personalization: DIY excels for one-of-a-kind touches and meaningful motifs not available off-the-shelf.
- Quality Control: Professional printers offer industry techniques (foiling, letterpress); DIY lets you tweak every detail but requires patience for perfection.
Remember: You don’t have to DIY every component. Combining custom-printed cards with hand-assembled extras (like wax seals or painted details) often yields the best balance.
Planning Timeline and Assembly Tips for Busy Couples
Staying organized will keep your DIY project enjoyable, not overwhelming. Here’s how to keep things on track:
- Begin design work at least 4–6 months before your mailing date.
- Order all materials (with extras) in advance.
- Batch each step: print everything first, then cut, then address, then assemble.
- Enlist help for repetitive tasks that don’t require design decisions.

Final Thoughts: Craft Your Story, Your Way
There’s a special beauty in something made by hand—especially when it’s for a day you’ll remember forever. Whether you’re embracing full-scale wedding craft ideas or just adding a meaningful DIY flourish, what your guests notice most is the care and thought you’ve invested. Your invitations are more than paper: they’re keepsakes and the first page of your celebration’s story.
Here’s to creating something uniquely yours—and loving every moment of making it.


